
This article provides a step-by-step instruction on how to enable Service Principal (SP) access to a Power BI workspace in dedicated capacity (Power BI Premium or embedded/A sku).
In the following, I will try to highlight the minimal number of steps necessary to enable Service Principal authentication. You can find all the details in the official documentation: Automate Premium workspace and dataset tasks using service principals.
Why Service Principal access?
In order to set up unattended jobs or pipelines that perform XMLA write operations (refresh, deploy, etc.) on a dataset in a Power BI workspace, we have to use a Service Principal. Specifically, if we want to use Tabular Editor’s command-line interface to perform a model deployment, we don’t have any other options, as the command-line does not allow interactive authentication, which is required on any tenant that has multi-factor authentication (MFA) enabled.
These are the steps we need to go through in order to set this up. Note, these steps has to be performed by a user with Power BI Administrator and Azure Active Directory Administrator permissions:
Enable XMLA read/write access on a Power BI workspace
For most scenarios that involve Tabular Editor, we need to enable XMLA read/write on our Power BI workspace.
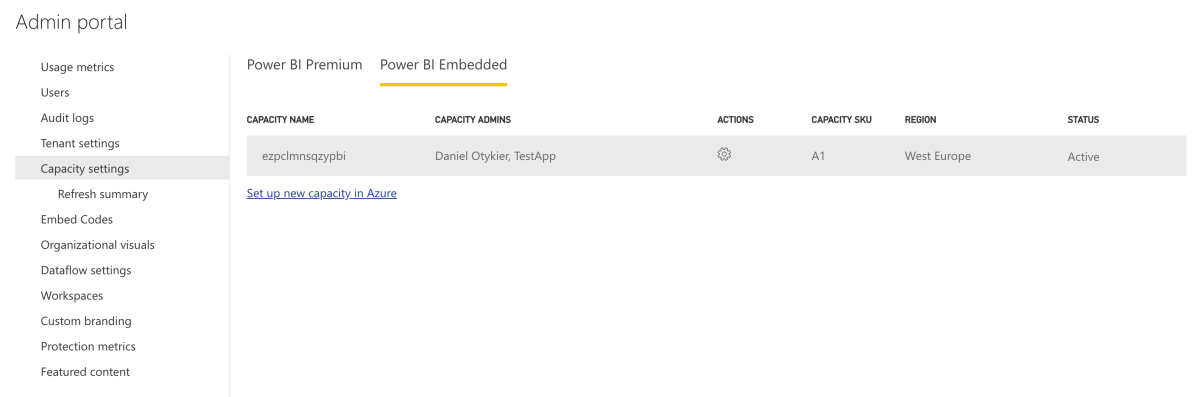
- In the Power BI Admin Portal, go to Capacity Settings. If your organization uses Power BI Premium, locate the capacity that hosts your workspace under the “Power BI Premium” tab. If your capacity is a Power BI Embedded or A SKU, locate it under the “Power BI Embedded” tab. Click on the capacity name.
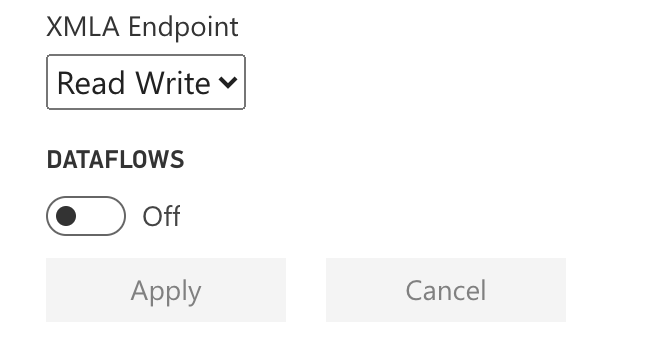
- Expand the “Workloads” section. Scroll down and locate the XMLA Endpoint dropdown. Set it to “Read Write”. Note: At the time of this writing, there’s a bug that requires you to also disable the “Dataflows” workload. Click “Apply”.
- At this point, you should be able to connect using interactive (personal) authentication and make changes to datasets in the workspace using Tabular Editor, provided your user is an administrator of the workspace. Use the following string as the “server name” when connecting:
powerbi://api.powerbi.com/v1.0/<organization name>/<workspace name>
Warning: Once you make a change to a dataset hosted in an XMLA write-enabled workspace using external tools such as Tabular Editor, you will no longer be able to download a .pbix file from the dataset. This is a limitation on the Power BI Service which will hopefully not apply once XMLA read/write reaches general availability (it’s still in preview as of this writing).
Create a Service Principal
- In the Azure Portal, go to Azure Active Directory. Take a note of the Tenant ID. You will need it later, when specifying the connection string.
- Go to “App Registrations”, click “New registration”.

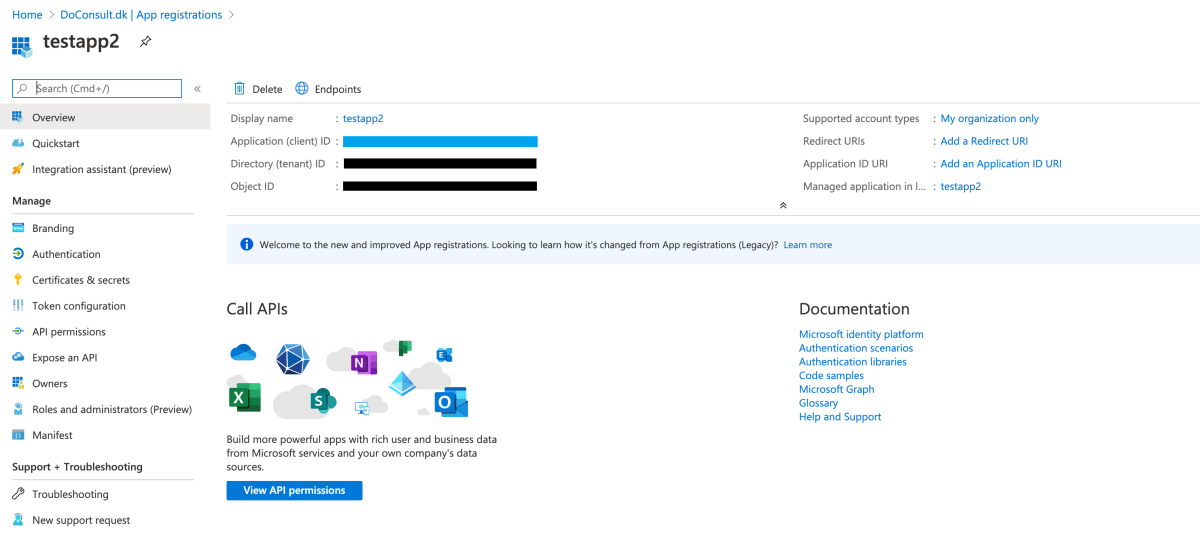
- Provide a name for the Service Principal. Leave the account type setting as single tenant and the redirect URI blank. Hit “Register”.
- Take a note of the Application (client) ID. This will also be needed later, when specifying the connection string.
- Click on “Certificates & Secrets” and then “New client secret”. Description is optional. Set the expiration as desired (but remember that you’ll have to update any connection strings that use the Service Principal later on, when the secret expires).
- Write down the secret. You won’t be able to retrieve it later on, and it is needed when specifying the connection string.
Create a Security Group and include the SP
- Go back to Azure Active Directory in the Azure Portal. Click on “Groups”. Then “New Group”.
- Leave the “Group type” as “Security”, give it a name and an optional description.
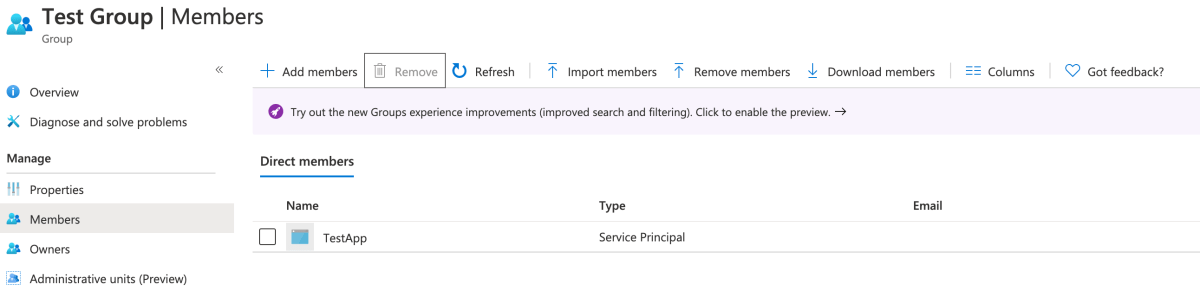
- Go to “Members” of the newly created group. Click “Add members” and then search for the Service Principal you created above, using its ;name as the filter string.
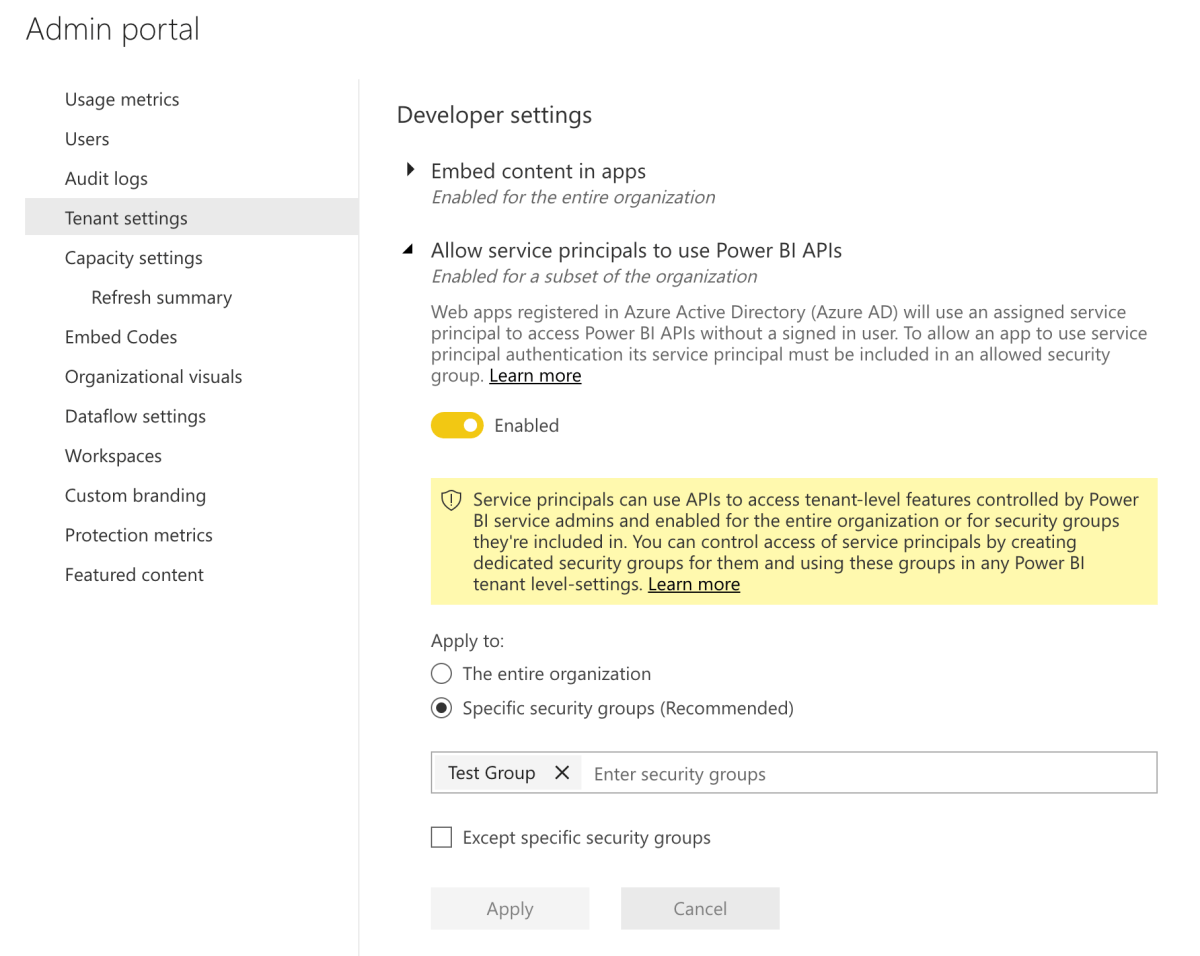
Enable Service Principal API access
- Log in to PowerBI.com as a user with admin access (that is, the user has the “Power BI Administrator” permission assigned in Azure Active Directory).
- Go to the Admin Portal, click “Tenant Settings”.
- Scroll down to locate the “Developer section”. Expand “Allow service principals to use Power BI APIs”.
- Enable the setting. Under “Apply to”, make sure “Specific security groups (Recommended)” has been selected, and enter the name of the security group you created in the previous step. Click “Apply”.
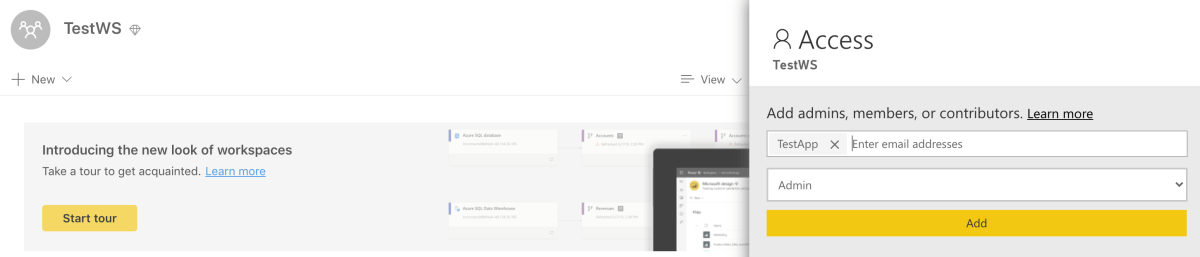
Set Service Principal as Workspace Admin
- Go to the Power BI Workspace. Click “Access”.
- Type the name of the Service Principal into the email address field. Set the dropdown below to “Admin”. Click “Add”
Connect with Tabular Editor
Note: You need the latest version (2.10.0) of Tabular Editor for this last step to work, as the Power BI Service manages the database IDs independently of their names, and previous versions of Tabular Editor always assumed identical database IDs and names. If you’re using an earlier version, you may not be able to overwrite an existing dataset, and you might see an error message even after successful deployment.
Sometimes, it can take a few minutes for all of the settings in the above steps to come through, so go grab a cup of coffee. When you come back, you can test the Service Principal connection using Tabular Editor. Provide the following connection string as the “server name” when connecting:
Provider=MSOLAP;Data Source=<xmla endpoint>;User ID=app:<application id>@<tenant id>;Password=<application secret>Make sure to replace the placeholders with their actual values:
- <xmla endpoint> (same as when connecting manually: powerbi://api.powerbi.com/v1.0/<organization name>/<workspace name>)
- <application id> (from Service Principal)
- <tenant id> (from Azure Active Directory)
- <application secret> (from Service Principal)

Remember – if you want to make a change to the model, you only need to hit CTRL+S to save the change directly back to the Power BI Premium capacity (this is probably not the best thing to do on a production dataset…). Alternatievly, you can deploy the model metadata as a new dataset by going to the Model > Deploy menu (or hit F6), and then use the same connection string for the server name.
You can also perform the deployment using Tabular Editors command-line interface, which is what you typically need for CI/CD integration. For example, to deploy a local Model.bim file as a dataset named “AdventureWorks” use the following command. The -O switch allows you to overwrite an existing dataset with the same name:
start /wait TabularEditor.exe Model.bim -D "Provider=MSOLAP;Data Source=<xmla endpoint>;User ID=app:<application id>@<tenant id>;Password=<application secret>" "AdventureWorks" -OThat’s it! Feel free to post questions below or on GitHub.