.jpg?width=50&height=50&name=Johnny%20Headshot%2005%2013%20Low%20Res%20(10%20of%2013).jpg)
Key takeaways
- Build your first Databricks model: With the prerequisites done, Borp connects Tabular Editor 3 to Databricks and imports tables to start modelling.
- Import tables and relationships: Connect to Databricks with a personal access token, choose your source tables, and bring in relationships.
- Develop the model properly: Apply friendly naming, import relationships, and add metadata descriptions to satisfy Best Practice Analyzer rules.
- Deploy when you're ready: Set up credentials and deploy your semantic model, with C# scripts to lean into Databricks-specific features.
This summary is produced by the author, and not by AI.
Start building
Borp has the Databricks prerequisites in place: a SQL Warehouse, connection details, and the required driver for Tabular Editor 3. The next step is to build a Power BI semantic model from Databricks data.
This article walks through importing tables, adding relationships, reusing Unity Catalog metadata, and deploying the resulting model to Fabric.
This article is part 5 of the series; part 4, How to configure a Databricks SQL warehouse for Power BI covers the warehouse, connection details, and ODBC driver needed before this build begins.
Tabular compatibility
It's first worth noting that only Tabular Editor 3 includes the Databricks data source connection type. It's still possible to use Tabular Editor 2 with Databricks, but you'll either need to hand code (or somehow script) the import of tables and columns, and you'll miss out on features such as being able to browse and inspect tables. An alternative is to import tables using Power BI Desktop and then use Tabular Editor 2 for further development once tables are set up.
But then of course you're still missing out on all the other great features and benefits of Tabular Editor 3, such as the live development environment, DAX Debugger, and macro recorder (just to name a few).
Importing your tables
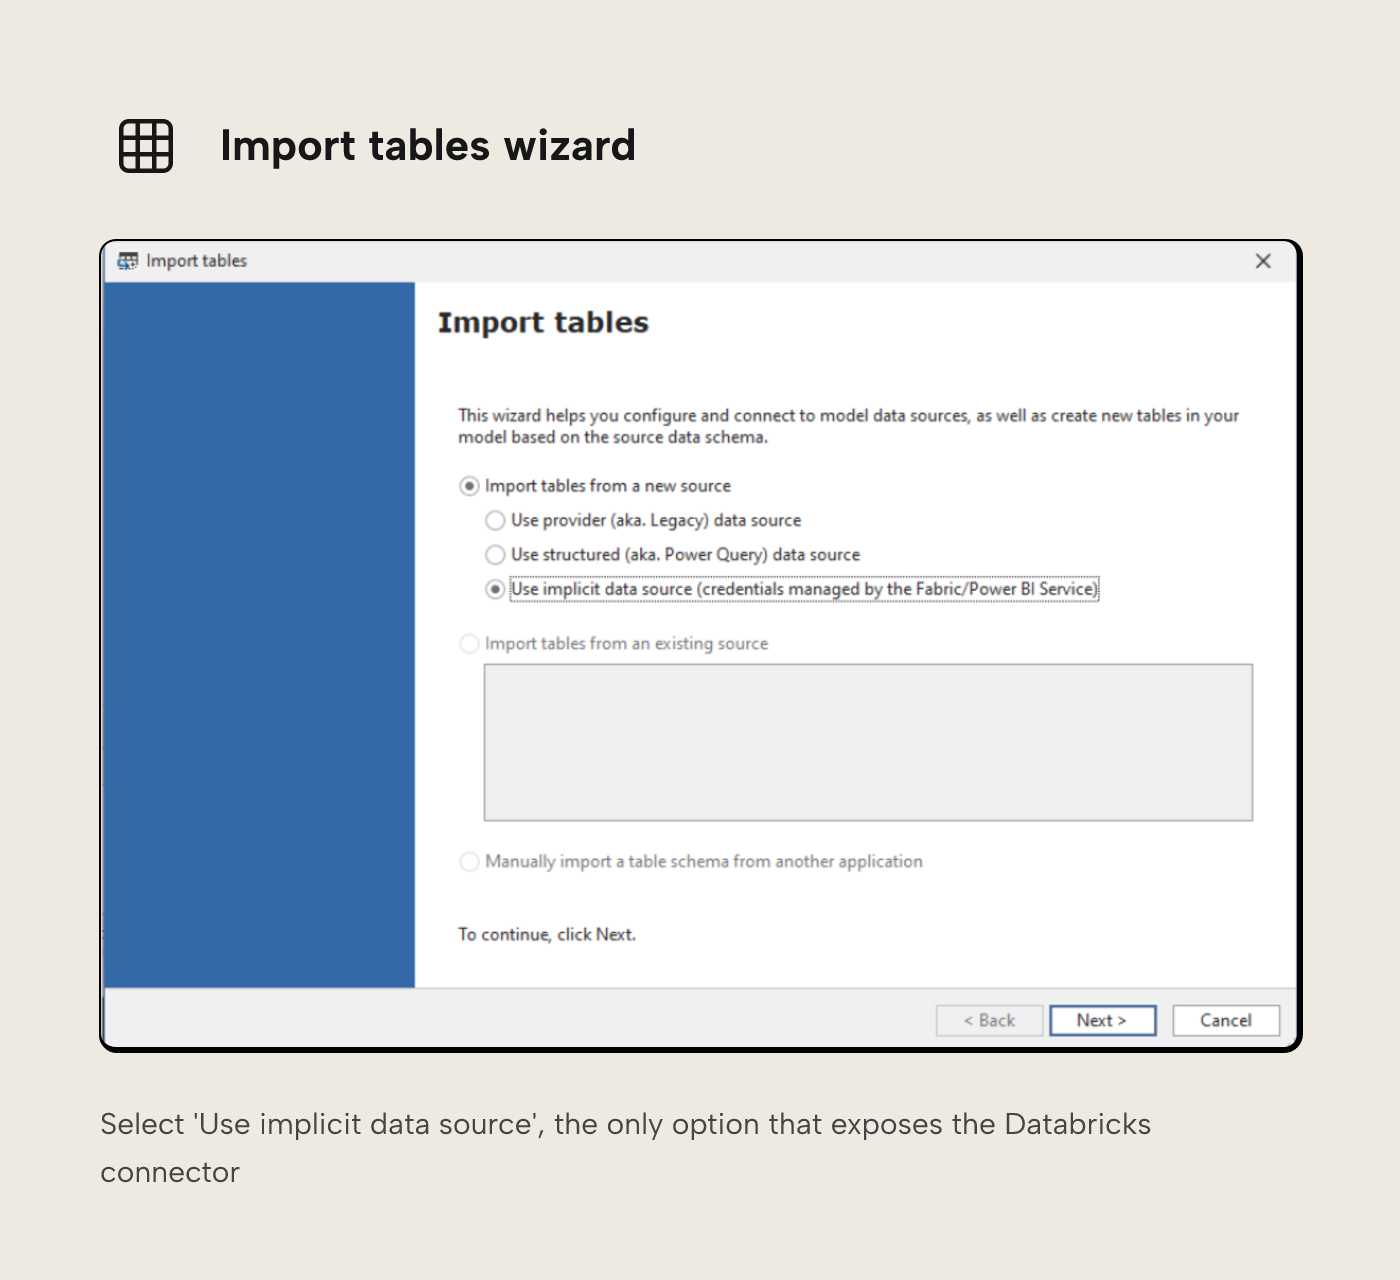
In Tabular Editor 3, from the Import tables dialogue, you should select 'Use implicit data source'. This is the only option that provides the Databricks connector.
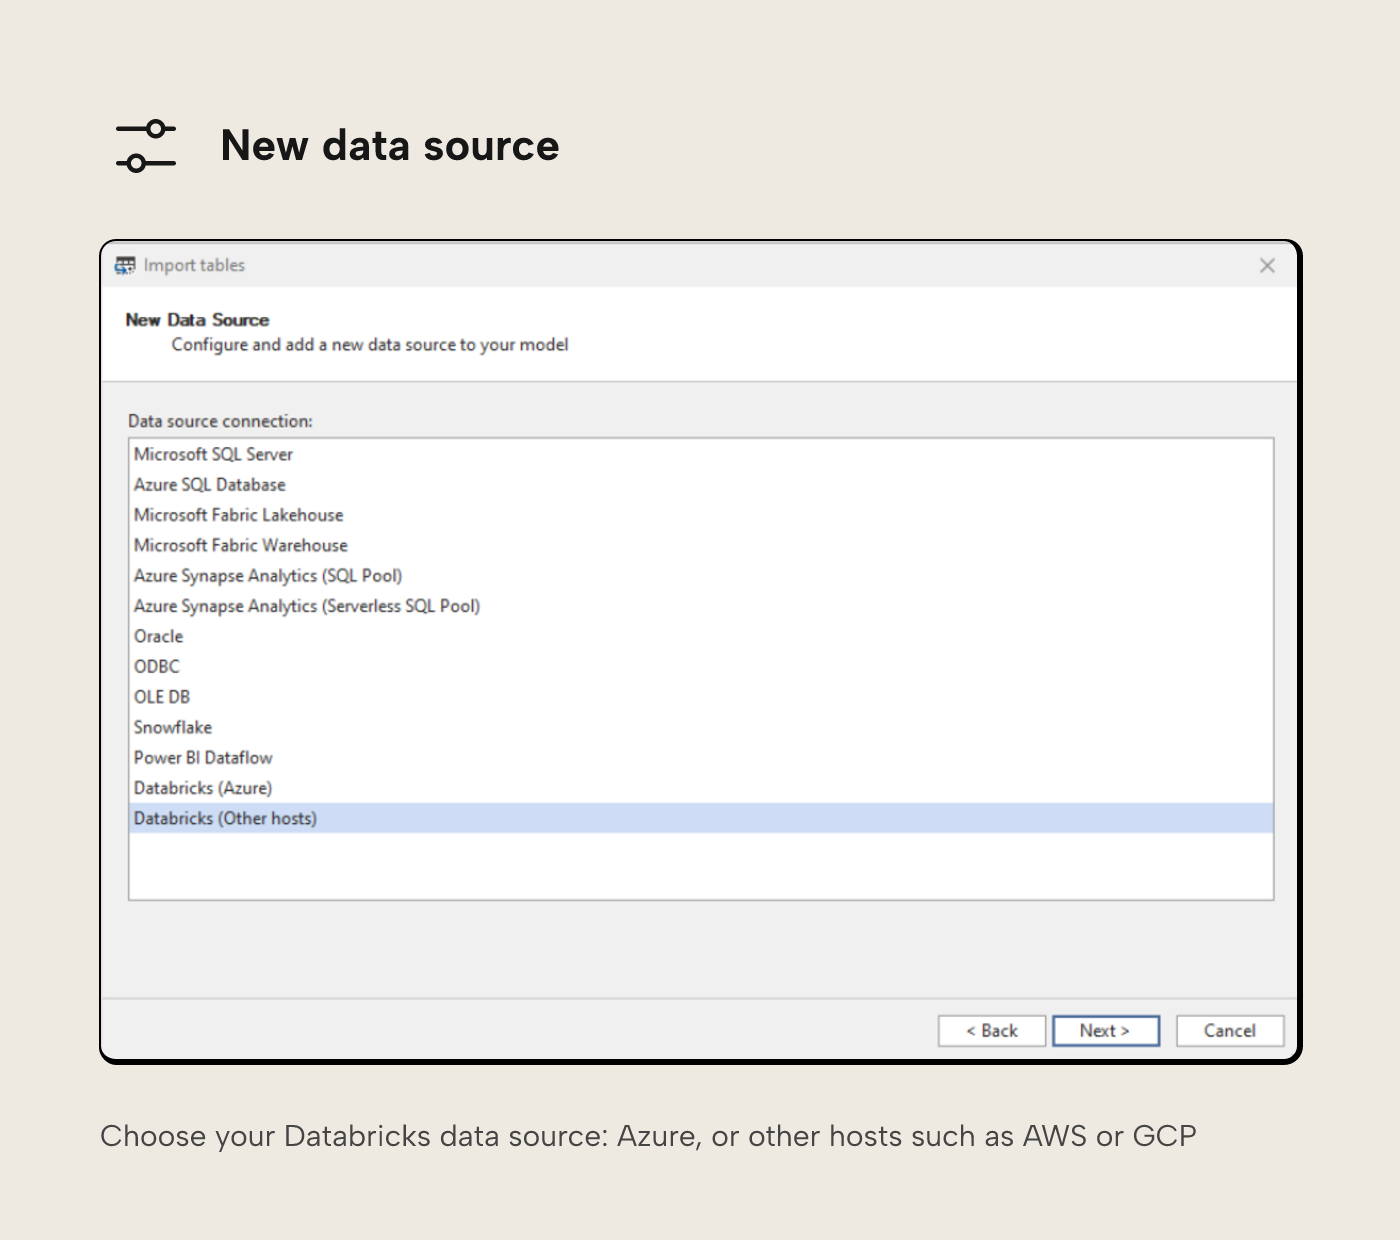
From here you can select your Databricks data source, either Azure or other hosts (for example, you may be connecting to Databricks hosted in AWS or GCP).
You'll next need to enter connection details. We looked at where to get this information in the SQL warehouse setup article.
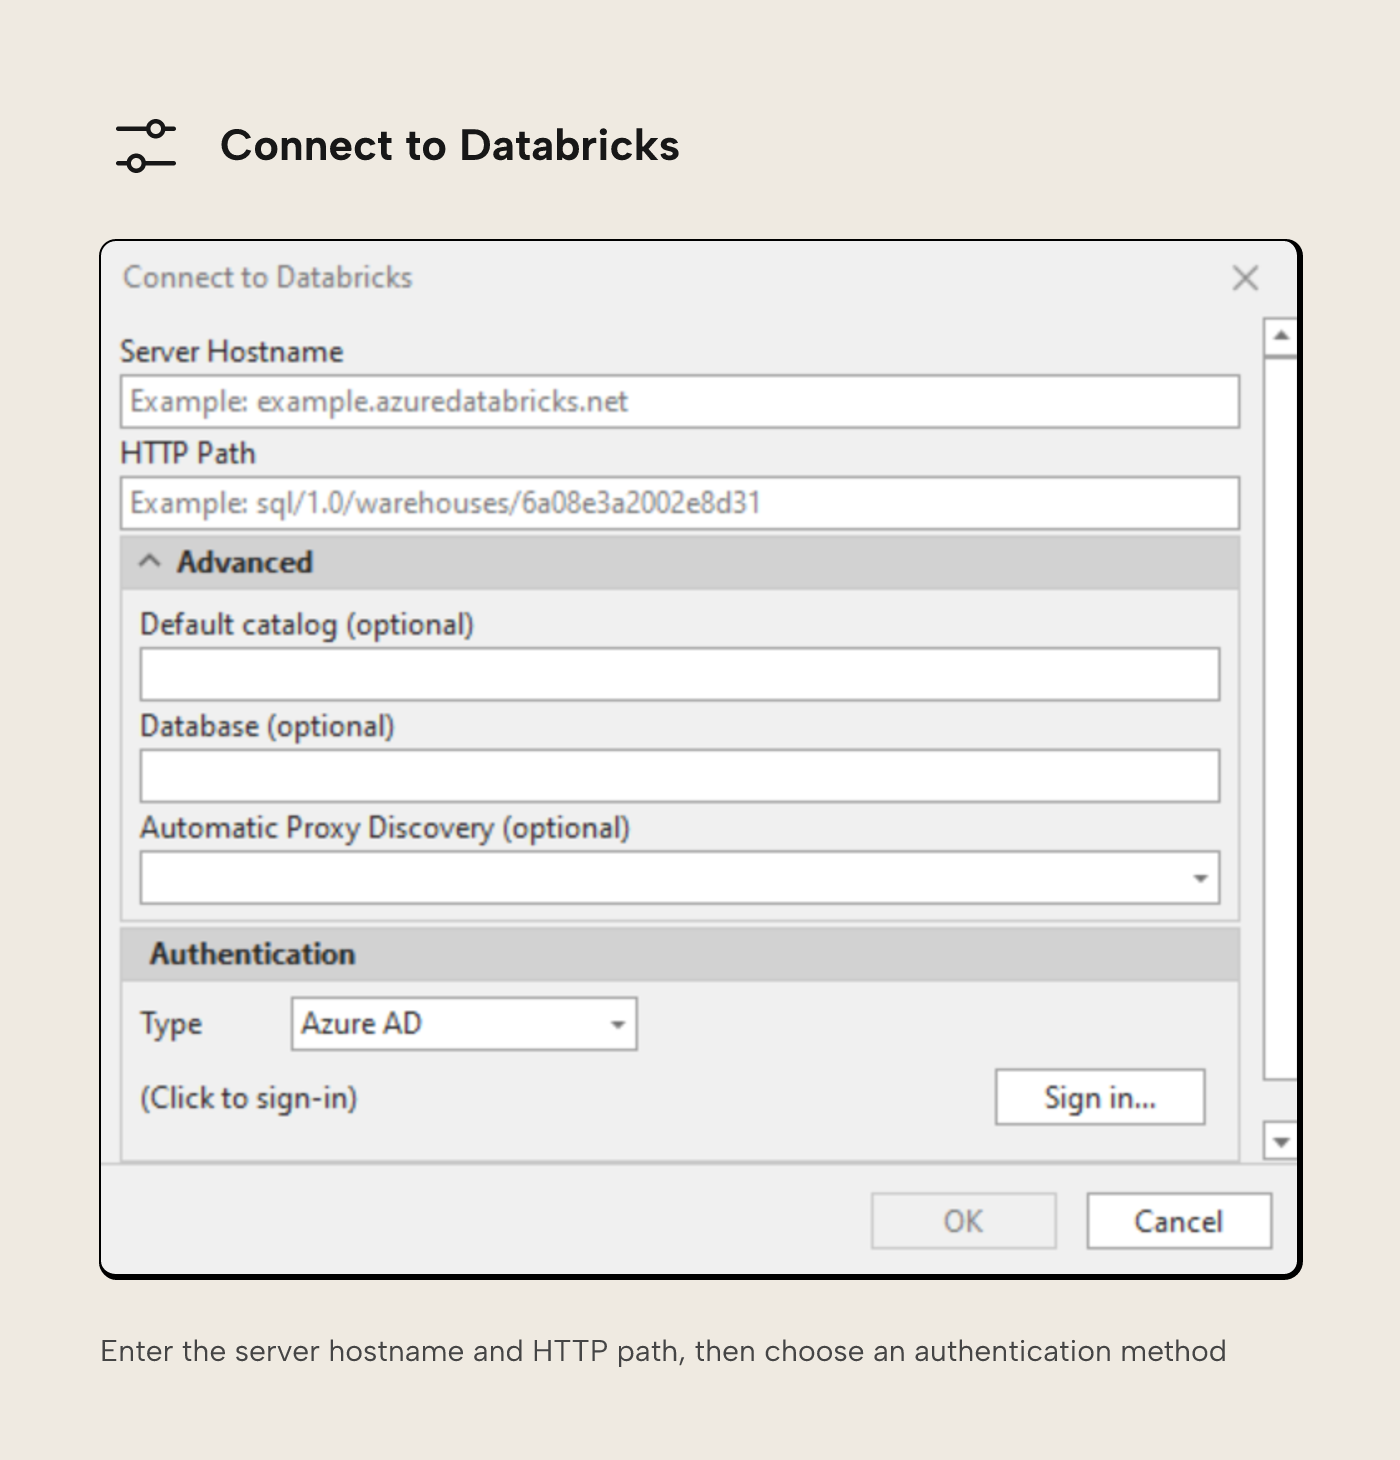
You'll also need to choose an authentication method. Full documentation on how to authenticate Tabular Editor 3 with Databricks is available here. Whilst doing development work, using single sign-on with Azure AD (now called Microsoft Entra ID) is a convenient option, but this may not be set up for non-Azure services.
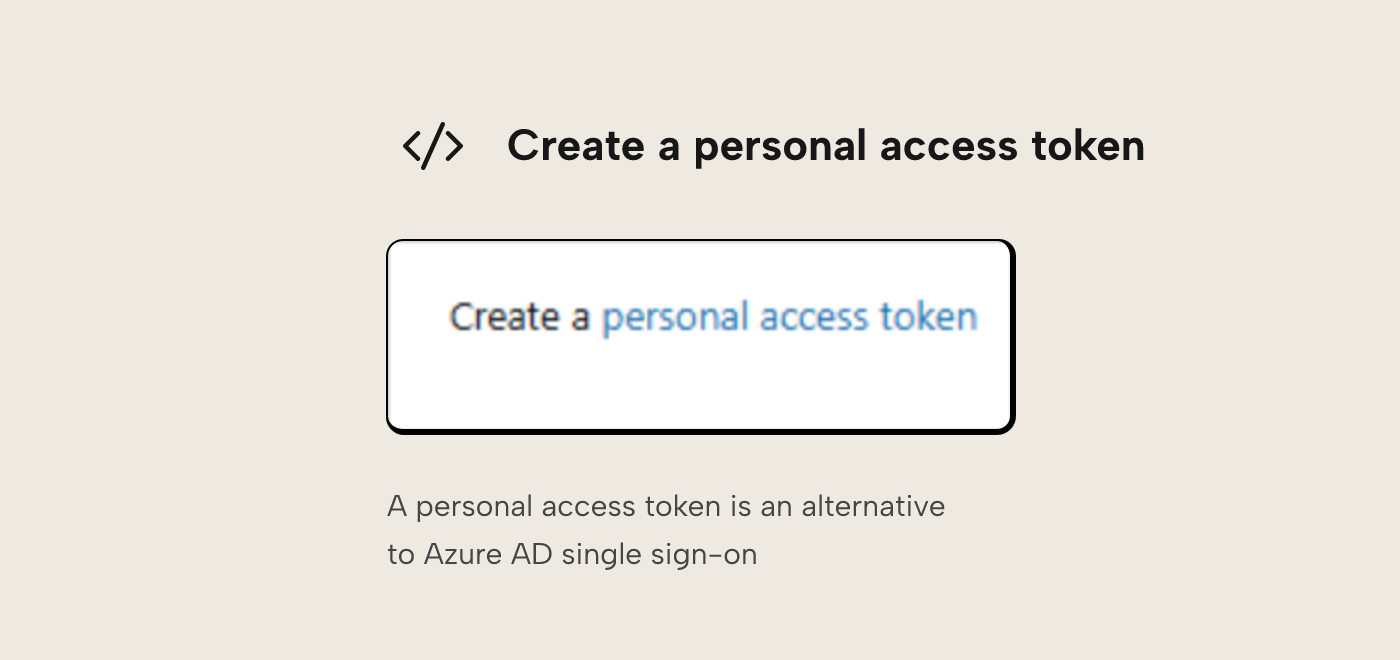
An alternative is to use an Access Token. An Access Token (labelled as Personal Access Token in Databricks) is a short lived (default of 90 days, but it can be changed) authentication method, that can be generated from the connection details page of a SQL Warehouse.
The next page of the wizard will only allow the option of 'Choose from a list of available tables and views', though here you can choose to use DirectQuery if you wish.
After this, you'll be directed to a dialogue pane that allows you to browse Unity Catalog and select any tables or view you wish to include in your semantic model.
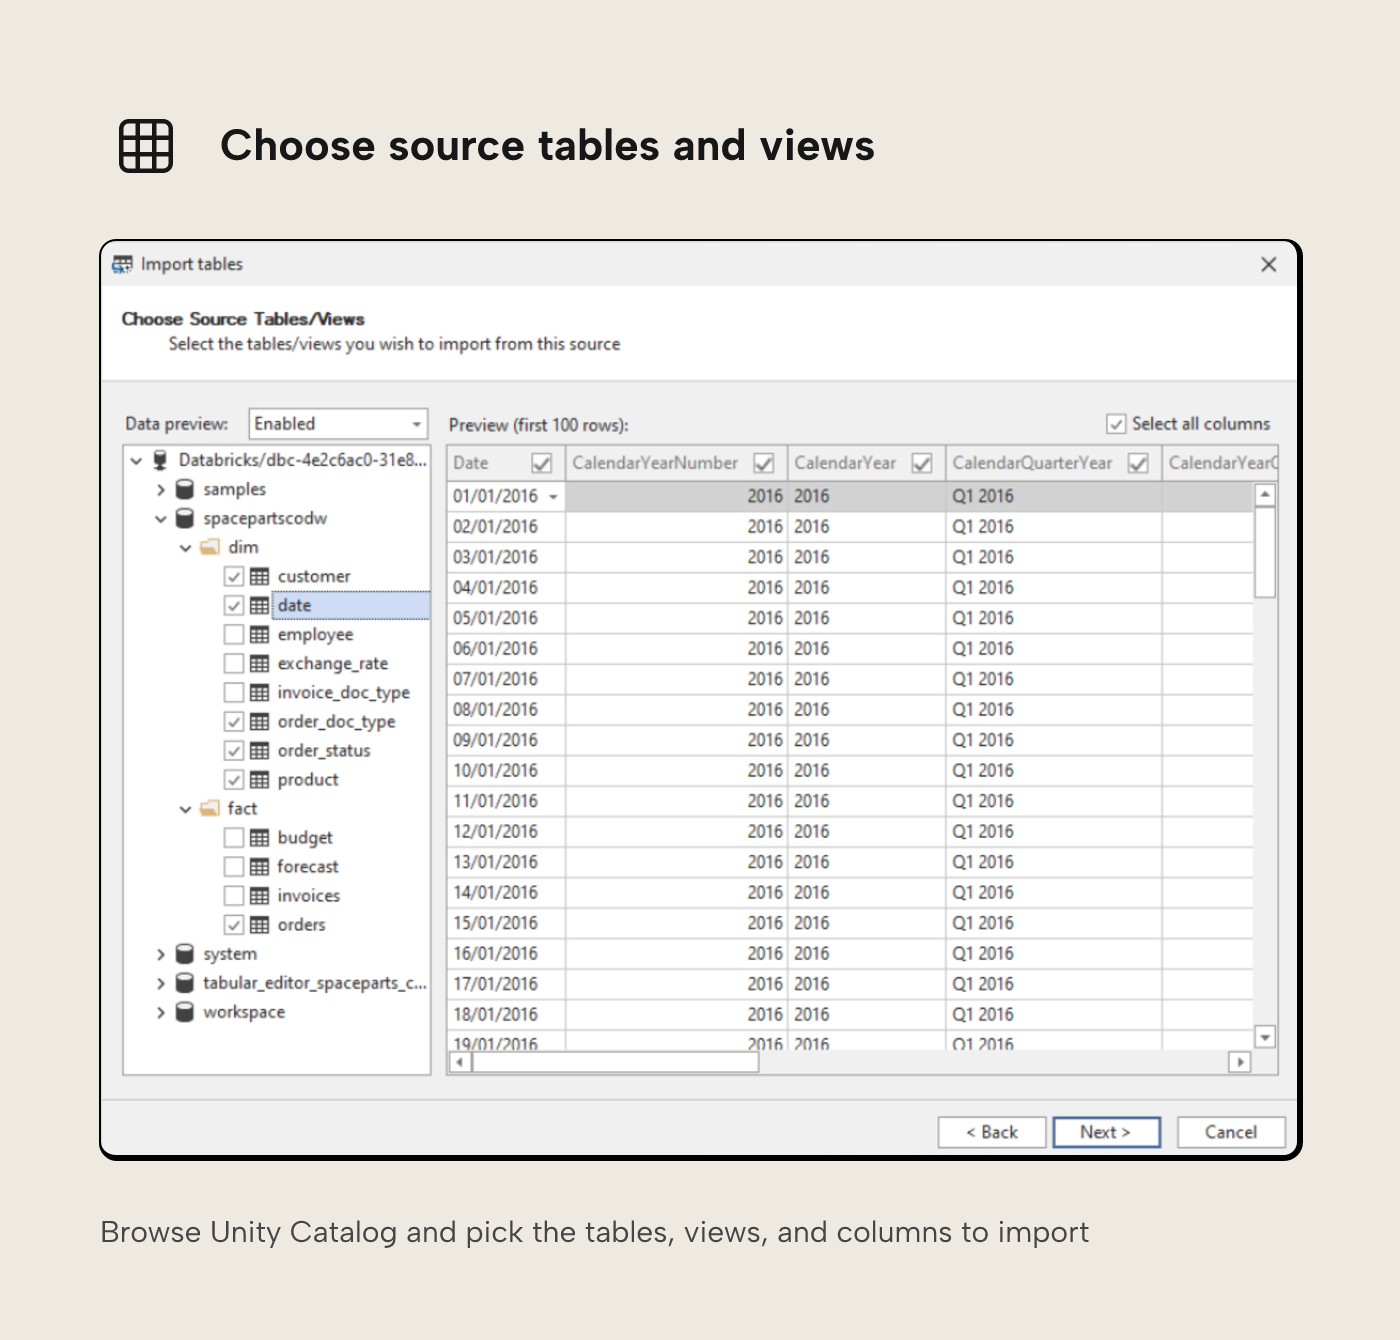
From here, you can also inspect data, and if you clear the 'Select all columns' check box, you can also choose which columns to include or exclude. Once happy with your selections, confirm to import.

Developing your model
From here, you can develop your semantic model just like you would with any other data source.
The next sections include scripts that help with common Databricks model-development tasks.
Friendly naming
In Databricks Unity Catalog it's not possible to use capital letters in table names. A common way to make tables names more readable without using capital letters is to adopt snake_case. Also, whilst column names can contain spaces, it's often advised against as these can be cumbersome to work with, meaning data engineers most often use snake_case, camelCase or PascalCase.
However, we want users of our semantic model to see business-friendly names in our model. This script will loop through all tables in the model and make sure friendly, Proper Case formatting is applied.
Whilst doing this, it'll also apply some best practice recommendations, setting default summarization for all columns to none and also setting format strings for DateTime type fields (this script is set up to use format yyyy-mm-dd but you can alter the script at line 61 if you prefer)
This script isn't strictly for use with only Databricks – use it with any model you like, regardless of data source, but it has been built with some of the limitations of Databricks in mind.
Importing relationships
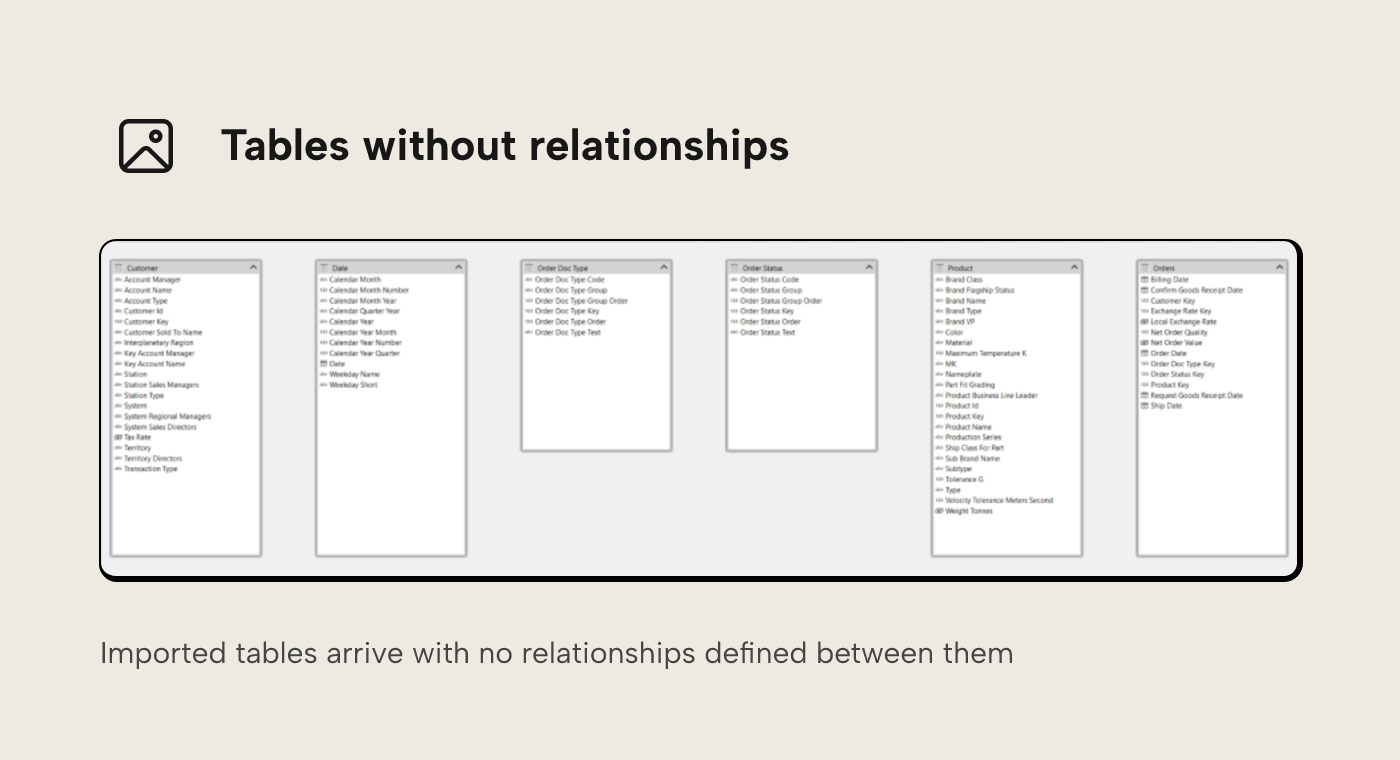
One thing you may notice after you have imported all your tables into Tabular Editor, is that no relationships between the tables are defined.
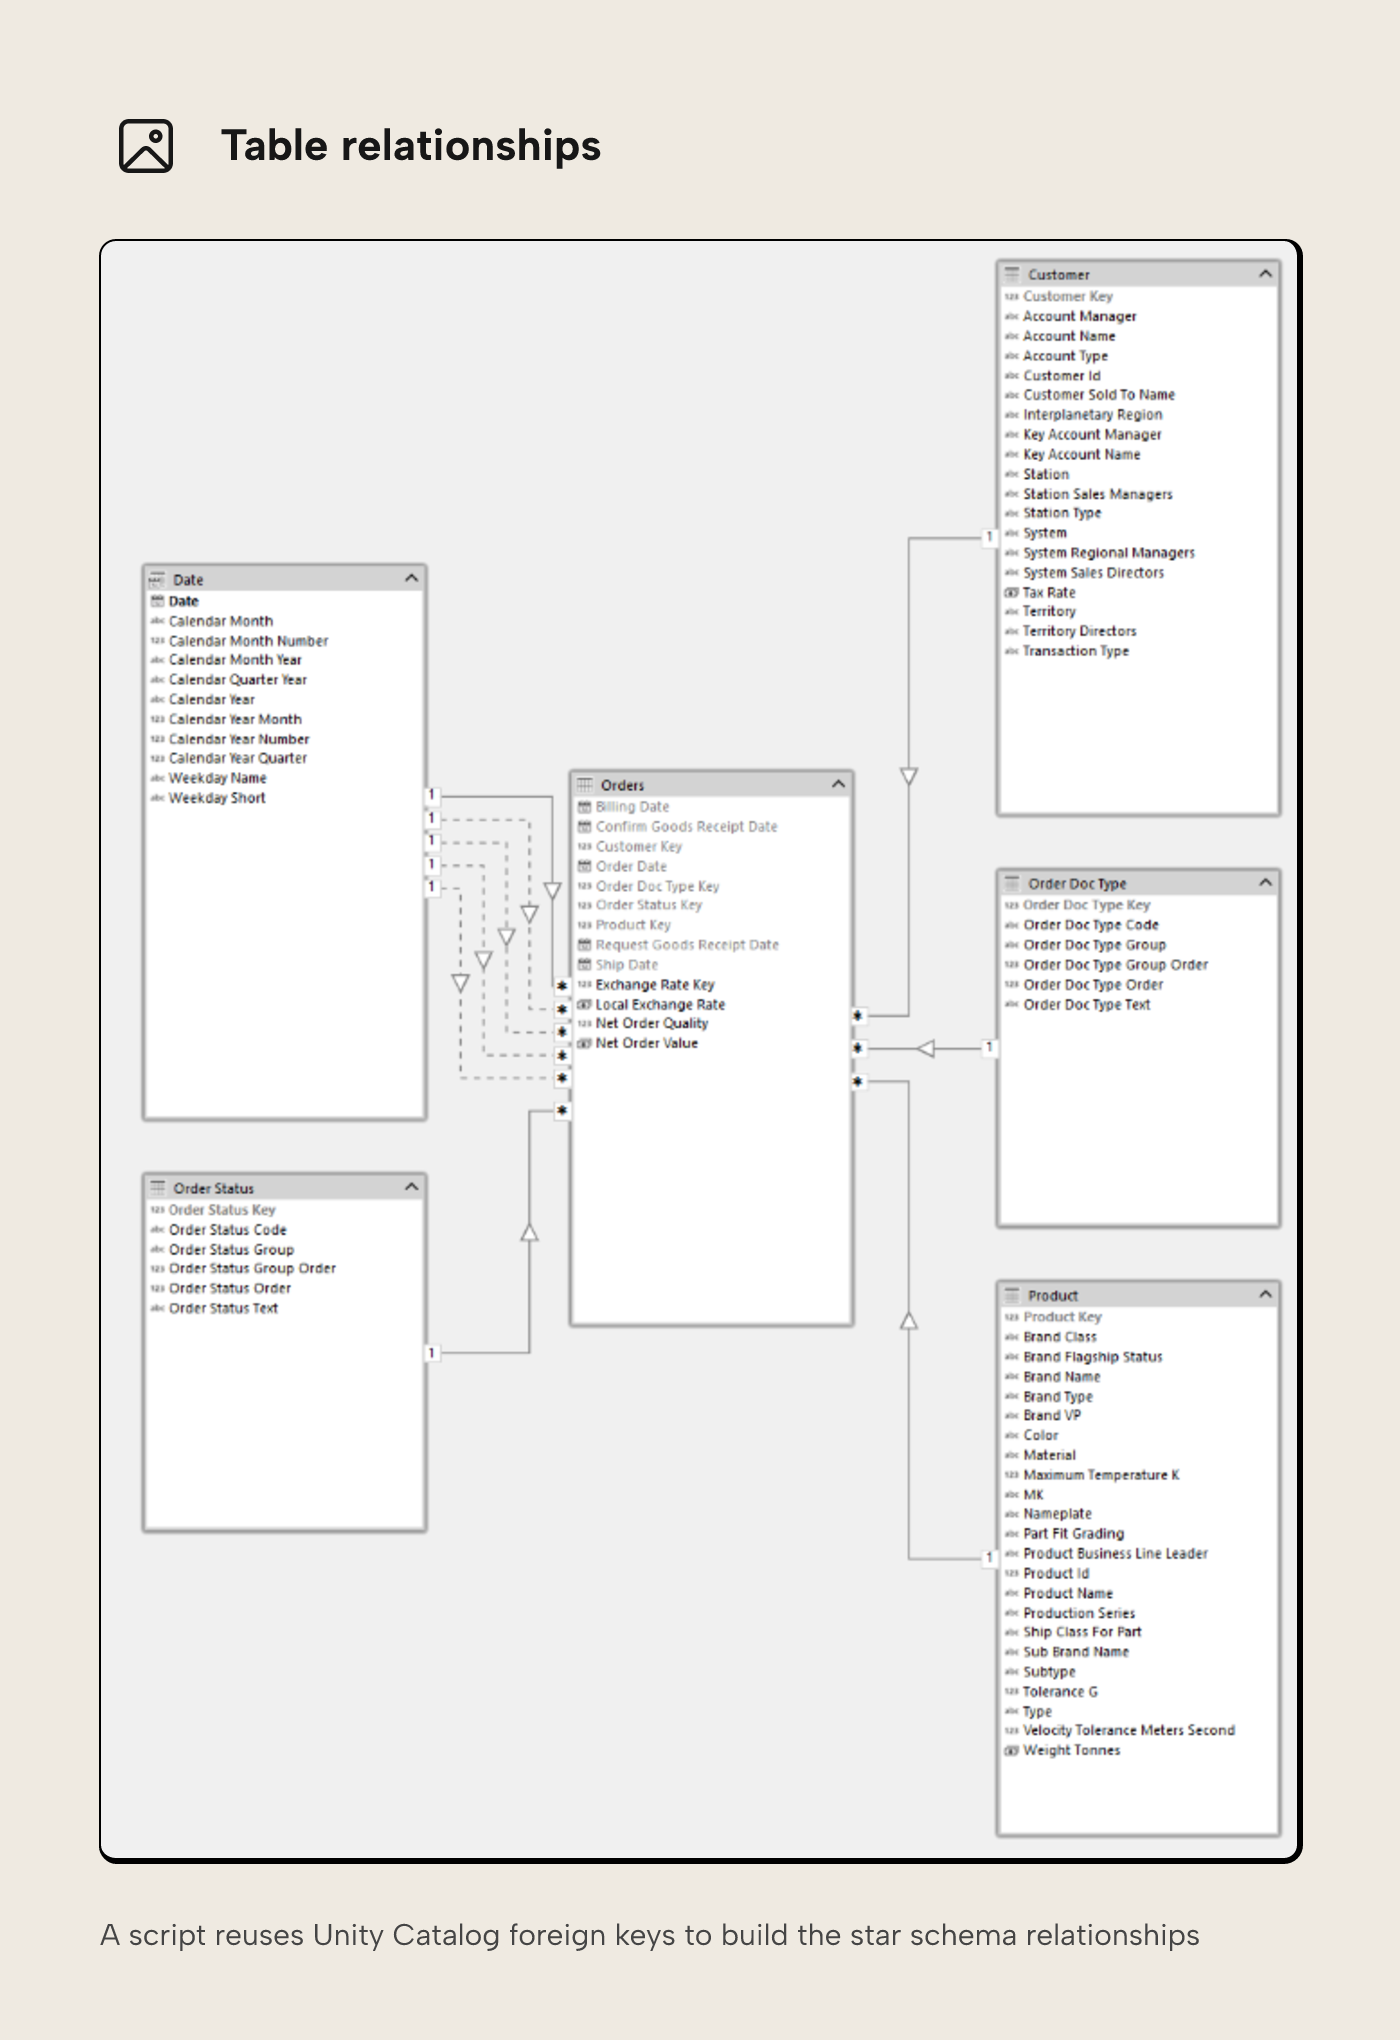
If you remember back to the Unity Catalog article, you may recall that we can define primary and foreign keys in Unity Catalog, and there's even an ERD view that you can use to see these relationships more graphically.
Instead of creating these relationships manually in Tabular Editor, you can reuse the information in Unity Catalog with a script.
Using this script, you can detect Foreign Keys on a table and then create relationships back to the relevant tables where present in the model. You must select the tables with foreign keys to do this (typically a fact table, and in our example the table fact.orders)
When you execute the script, you'll be prompted for a Databricks Personal Access Token. This lets the script authenticate back to Databricks and retrieve the relevant information from Unity Catalog. Once completed, you'll be prompted with the number of new relationships created to your selected table. You can run the script as many times as you like. It will only ever create new relationships where it finds missing relationships in the model.
For role playing dimensions, where the same table might have multiple foreign keys relating to a single table, the first relationship detected will be the active one, and all other subsequent relationships are created as inactive. You may want to revisit these particular relationships to make sure the correct relationship is active.
Whilst importing the relationships, the script will also hide primary and foreign keys and set IsAvailableInMDX to false (with the exception of DateTime type primary keys). Primary keys are also marked as IsKey = TRUE in the semantic model.
The script uses the information_schema tables in Unity Catalog to retrieve this information, so you may need to double check with your Databricks administrator to make sure you have permission to query these tables.
Metadata descriptions
Most Enterprise Semantic Model developers are likely familiar with the following Best Practice Analyser warning:
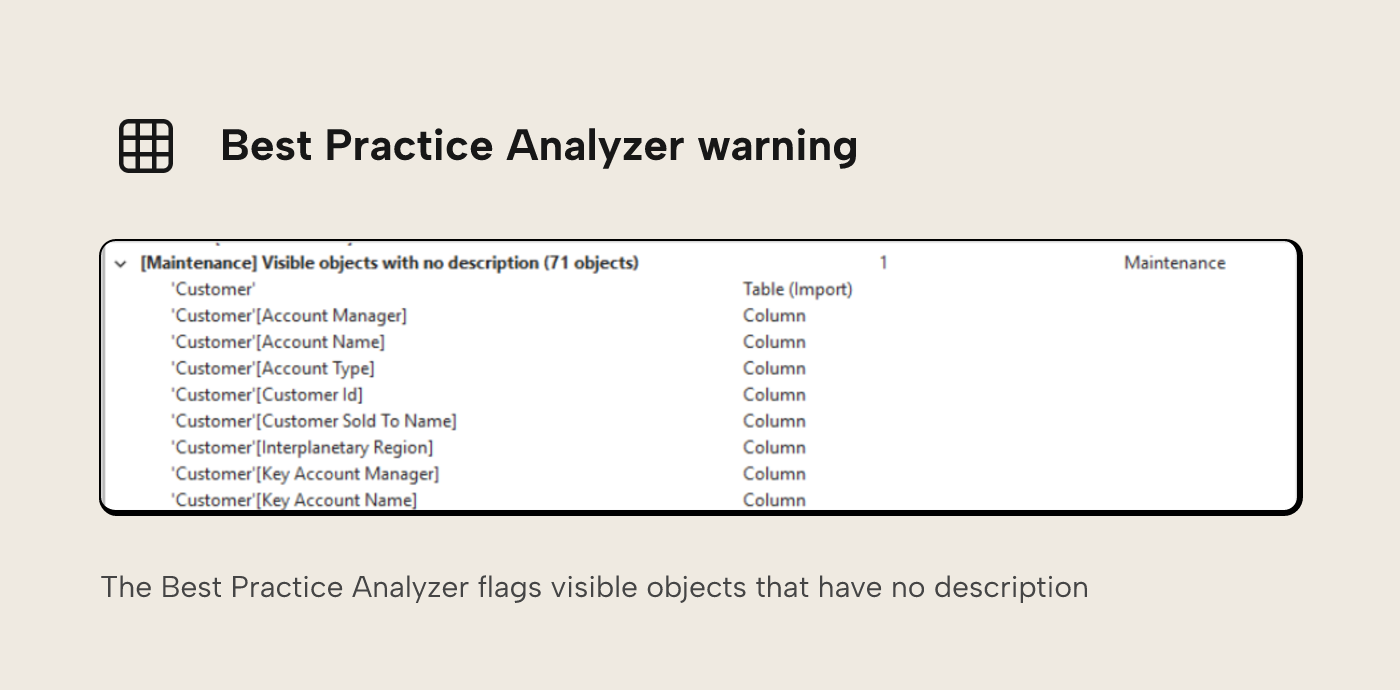
Adding descriptions to all your tables and columns can be a tedious task. The descriptions already exist in Unity Catalog, as shown in the Unity Catalog article, so the better option is to reuse that metadata.
Well... there’s a way now!
This script loops through all selected tables (you can select more than one by holding down the Shift or Ctrl key) and retrieves the descriptions for both the tables and all its columns from Unity Catalog and brings them into your Semantic Model.
Again, you'll be prompted for a Databricks Personal Access Token to run the script, and this script also relies on your having access to query the information_schema. Whilst running the script you'll get a notification for each selected table to let you know which descriptions have been updated and how many updates have taken place.
Deploying the semantic model
Once Borp has added measures to their semantic model and various other refinements, they’re ready to deploy to the Fabric Service.
There are many different paths to deploying your semantic model. You can do it manually from Tabular Editor or you can create automated CI/CD processes using tools such as Azure Dev Ops and GitHub.
The OG pattern was outlined in a series of blogs by our very own Daniel Otykier, and my colleague Liping Huang recently presented on the subject, specifically using Databricks, at the 2025 edition of SQLBits – I'm looking forward to the video of that session dropping in the near future.
Regardless of the process Borp decides to follow, there's one last thing it's worth mentioning, and that's setting up credentials once the semantic model has been published.
Once deployed, you'll need to specify the authentication type and credentials.
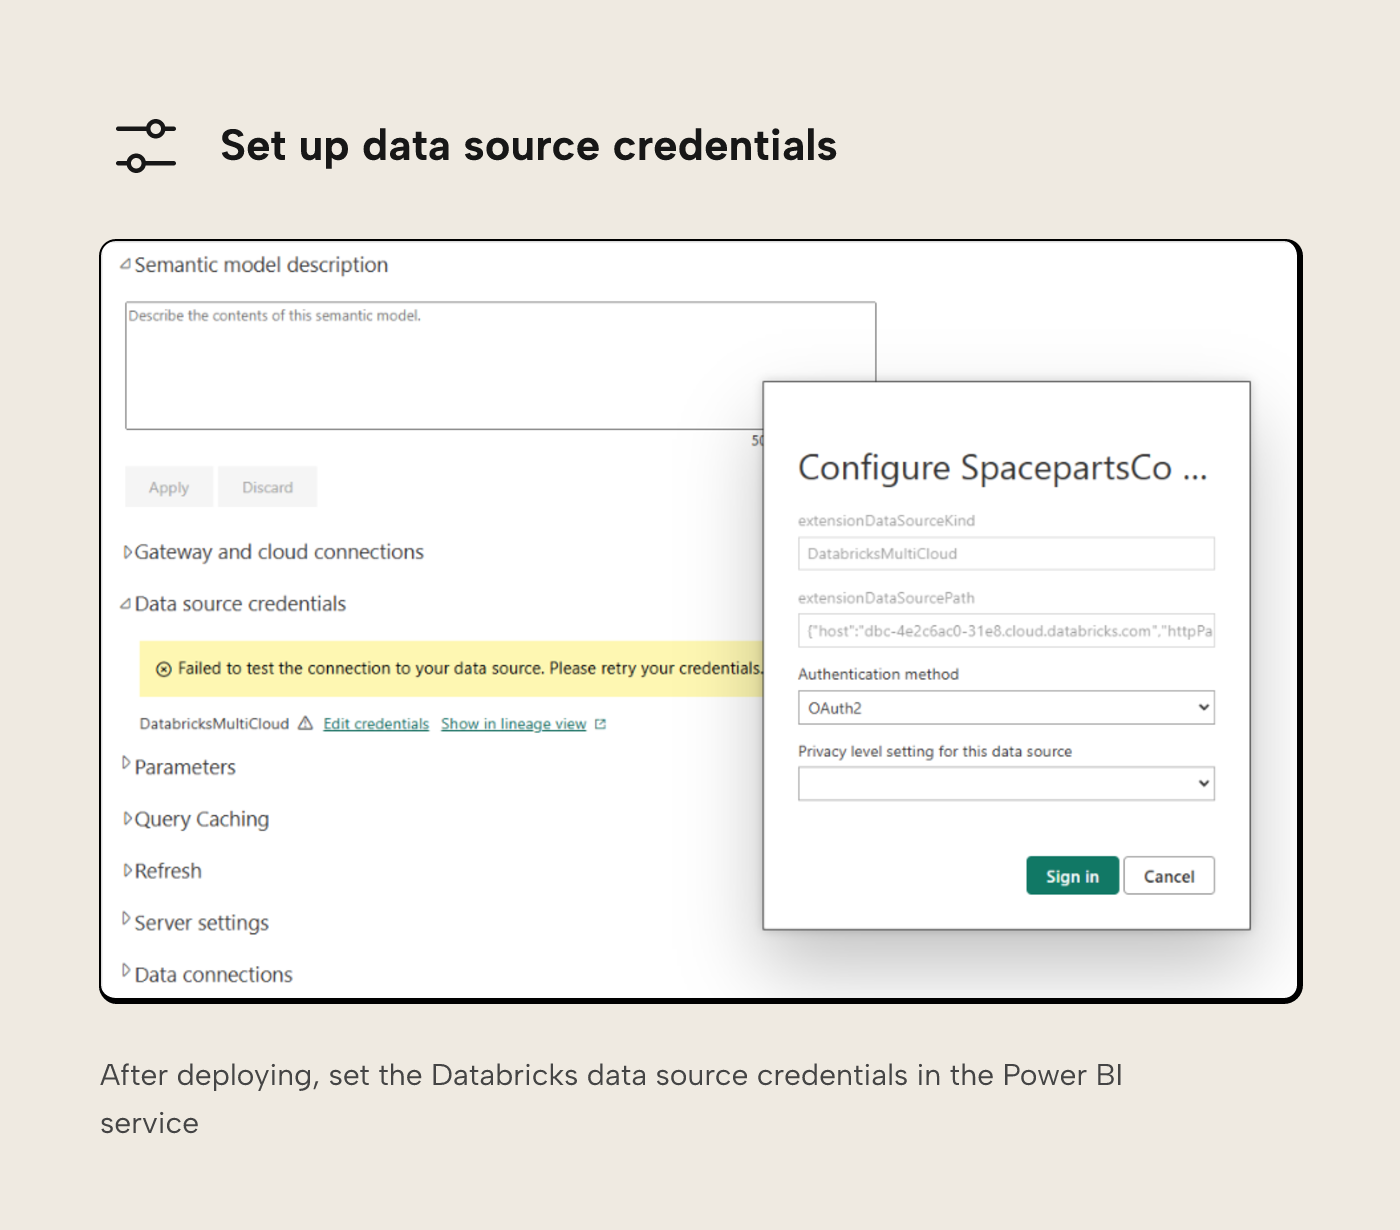
If your Databricks instance is on a private network, this may involve setting up a gateway. And you might also decide to set up the connection using cloud connections, rather than directly on the semantic model.
Selecting OAuth 2 authentication here will tie the semantic model to the user who sets up the credentials, which means if they leave the organisation, authentication is likely to start failing.
Instead, it's better to use the 'Key' option. What the Key option actually is, is an Access Token. Rather than use a personal access token, it's more robust to use an access token associated with a Databricks service principal. You should speak with your Databricks administrator about getting this set up.
Once done, you can set up and configure your model refresh as you see fit.
Wrapping up
At the start of the series, Databricks was unfamiliar to Borp. Over time, they found that many skills from relational databases and data warehouse products transfer directly to Databricks. Once they knew how to navigate the workspace, they could work productively with the new SpaceParts Co. data platform.
They have a good understanding of the concepts behind Databricks and Lakehouses, they're comfortable exploring data in Databricks using features such as Unity Catalog and Databricks SQL, and once they'd configured a SQL Warehouse for their use and set up additional software to allow them to use Tabular Editor with Databricks they were well on their way to building their first Databricks semantic model.
With the new C# scripts and the Databricks metadata available in Unity Catalog, Borp is now in a strong position to build better data models faster.
If you followed along, you should now have the same starting point.
For further reading
- How to configure a Databricks SQL warehouse for Power BI (Tabular Editor). Covers SQL Warehouse configuration, ODBC driver setup, and the connection details needed before importing tables in this article.
- You're Deploying it Wrong! – AS Edition (Part 1) (Tabular Editor). The CI/CD deployment series referenced at the end of this article, covering the pipeline approach for publishing semantic models from Tabular Editor to production.
- What is Unity Catalog? (Microsoft Learn). Reference for the
information_schematables the relationship and description scripts query, important when troubleshooting permission errors during script execution. - Tabular Editor documentation (Tabular Editor Docs). Home for the C# scripts referenced in this article and tutorials for connecting to Databricks, including the scripts for friendly naming, relationship import, and metadata descriptions.
In conclusion
That wraps up the series. What started as unfamiliar territory for Borp turned out to build on familiar skills: many practices from relational databases and data warehouses transfer directly to Databricks. With a configured SQL Warehouse, Tabular Editor 3 connected, and a few C# scripts in hand, Borp is ready to build better data models faster on Databricks. For the full path from setup to model deployment, start with part 1, Getting started with Databricks for Power BI.
Build your first Power BI semantic model on Databricks data with Tabular Editor 3.
Give Tabular Editor a spin